Image editing software
Now we've established exactly what image editing software is, and what it does, let's move on to the next step ...
Why do you need image editing software?
I can see your reasoning here. You've just taken a load of photos.Most are acceptable, some are really good, and some are plain awful!
Consider the good ones for just a moment. Are they really good? I mean really, really, good?
When you compare them with more professional photos do yours lack something? Maybe you're not too sure what it is, but you just know there's something missing.
A little pizzazz?
Well, it's more than likely down to something called post processing. As explained in part 1, when a camera takes a picture it uses all sorts of clever computer trickery to make the photo look acceptable.
This means that any photo taken under fairly normal conditions will come out looking, well, fairly normal!
But you don't want "normal". You want punchy colours. Pin sharp image quality. You want the pizzazz!
And that's why you need image editing software.
It's the small touches made with image editing software that make a normal photo look much more like a pretty darn good photo!
Small touches that take seconds
To add that little extra something only takes a few seconds, provided you know what to do!Here's a fairly basic step-by-step inage editing procedure that will enhance every photo - give them all a little extra pop.
The basic steps are:
- Crop photo
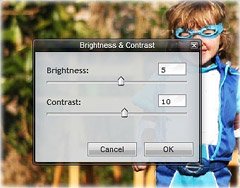
- Adjust brightness and contrast
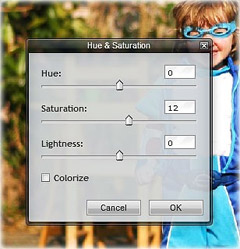
- Adjust saturation
- Sharpen photo
To give you a little more guidance - step 1, crop the photo. What you do here is grab the crop tool and draw a box around the part of the photo you want to keep.
Very often, less is more here. Don't be afraid to chop out large areas of your photo if you have to.
If you want more info on how to use the crop tool, I've written a crop tool tutorial here, and I've also written a tutorial on how to work out which bit of the photo to crop.
 Once you've cropped the photo to your liking, it's time to adjust the brightness and contrast.
Most of the time it's contrast that's lacking in photos, so adjust this first.
Once you've done that you might need to add a bit more brightness to the photo.
Saturation - this is next and it depends a lot on what your camera/phone has already done to your photo as to how much you need the image editing software.

You see, some cameras and phones are 'pre-set' to produce very saturated photos - sometimes too saturated. With others, it's the opposite.
So, have a look at your photo and move the 'saturation' slider in your image editing software until the photo looks right - it might need more, or less, saturation than when you started.
keep it sharp
But not too sharp.The last step is to sharpen your image, but bear in mind what I said about saturation - many cameras and phones add sharpening to photos.
Sometimes I'm sure they do it to disguise poor quality lenses!
Anyway, have a look at your photo in your image editing software and decide if it needs sharpening.
The best way to do it is to sharpen the photo, and then click the 'undo' button. Then click back and forth between 're-do' and 'un-do' so that you can see a before and after image.
Just pick the one that looks about right - simple!
