
Beginners Photography -
|
| This section
of the site concentrates on beginners photography. |
Getting More Light on Indoor Photographs
By
Indoor photography can be among the most challenging subjects for amateur and professional photographers.
Lack of windows, natural light and the terrible effects of artificial lighting can all create unappealing or even undistinguishable images.
There are ways to work around this however, and some "tricks" include:
Beginners Photography - Pay attention to the direction of existing light:
When composing photographs indoors it may be tempting to place someone in the brightest location possible in order to get the good lighting, but this may not always be the best method.

While side lighting can produce some artistic images, a good photograph may result from using a "fill flash" technique to balance any shadows on the face or subject.
Additionally, backlighting is another great method of using existing light to give the subject an appealing "glow" which can also be softened by the flash fill technique as well.
During
all such moments, the flash will over illuminate the scene,
eliminating the background entirely and brightly lighting a portion
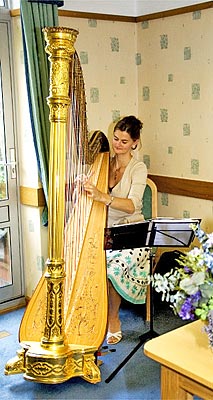
of the subject. (have a look at the example to the right here to
see the result of flash over illuminating a photo)
This
is a perfect occasion for red eye and poor results. It can also
cause the flash to be recorded in the glass of windows as well as
eyeglasses, which completely ruins even the nicest image.
Beginners Photography - Use indirect sources of light:
Is there powerful sunlight pouring into one area of the room?
This can be used to give a subject better lighting as the sun is so much brighter than any house lights or supplemental lighting on the scene.
One word of caution about using the lighting from windows - even if it is remarkably bright and illuminates the room. Most point and shoot cameras will slow down the shutter speed to catch the image clearly.
Because of this it might be a good idea to take the image from a tripod mount.
Beginners Photography - Use a tripod:
As just stated, indoor photography tends to slow down the shutter speed of the automatic sensor. This can cause blurry or shaky imagery.
It is a great idea to mount a camera on a tripod for indoor photography. This way the picture will remain sharply in focus despite longer exposures. Use the self timer setting to prevent any shaking when the shutter is fully depressed.
Go to the Stay
Focussed newsletter signup page
Beginners Photography - What about artificial lighting?:
When trying to light subjects for indoor photography, it is important to consider the effects on the image if a flash is used.
For example, if a group is at varying distances from the camera it is unlikely that the flash will balance the lighting - people in the background will be in shadow, and people in the foreground will be overexposed (bleached out).
For this reason it may be good to consider using both natural and flash lighting for such a scene.
It is also important to remember the dreaded "red eye" and use the special flash setting that eliminates it if available.
If not, a photographer should try to turn on every single lighting fixture in the immediate area to diminish the effects of the flash on the eyes of the subjects.

This page was written by my good friend Amy Renfrey. For a steady supply of Amy's tips, have a look at her professionally tailored ebooks and ezines, written especially for beginner photographers.
More beginners photography articles!
Subscribe to my monthly newsletter, "Stay Focussed".
You'll get even more digital photography tips and get to know about the
latest updates to the site.
(opens in new window)
Return from the beginners photography section to digital-photography-tips.net
home

